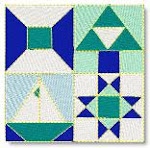
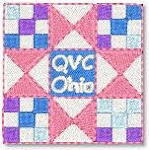
This pattern goes together very quickly, and gives you lots of open space in the center for adding embroidery and appliqué! There are only 14 blocks to piece, and two outer borders, so it will be on your table quickly.To download a PDF for this tablecloth, click on the button at the left to join the Candy Apple Quilts Yahoo Group --- the file is there waiting for you!
 Lots of people agree that sometimes it's just easier to keep stitching --- right over top of the embroidery! In the case of redwork designs, I think that's very true!
This quilt was done on a Gammill machine with a Statler Stitcher (computerized), and it would have been impossible to stop the machine for each tiny line that I crossed. The stitching is imperceptible on the redwork, and not a distraction at all.
The embroidery designs used in this quilt are from Bonnie Domeny at Threadlove Embroidery, and you can find the collection of all ten ballerinas here.


 This one was a bit of a challenge --- but then again, I just LOVE a challenge! I received an embroidered quilt top that just "demanded" to be cross-hatched in the center. I didn't want to stitch across any of the letters, because that would squash the satin stitches. I also didn't want to do tie-offs at every letter, though.... so I came up with this little technique for "cheating".
Do the cross-hatching as you normally would. Take a close look at the small photo that shows a close-up of the letter with the crystal in it. If you look at the blue satin stitch portion of the letter itself, you can see where I "jumped" over the blue portion of the letter during the cross-hatching process. The width of the jump stitch is less than 1/4 of an inch, but if I had stitched right through the letter, it would have crushed the satin stitches.
This was done with white thread, so as a result there were little tiny white jump stitches showing on most of the letters. I went to the fabric store, and bought a fine tip permanent fabric marker -- the kind with the tiny micron tip -- in exactly the same shade of blue as the letters. That's the most critical part -- matching the thread color.
Now, all you have to do is "color" the white thread that is laying on top of the satin stitches. The single thread will fade into the background of the satin stitches, and look just like another single stitch. On the back of the quilt, you will not want to cut those tiny stitches, or there will be some unraveling of your cross-hatching in the future.
For the jumps over the pink floral portion of the quilt, I did tie-offs, and started again on the other side.
And by the way, this alphabet is available in a beautiful heirloom collection from Platinum Embroidery! You will also be able to read a newsletter that has all of the instructions for making this wall-hanging project! Here's a link to the page that shows the entire collection:
Platinum Embroidery Make It Special Heirloom Collection
These letters stitch out beautifully! Enjoy!

 Here is another example of using embroidery and appliqué before the quilt is assembled. In this tablecloth, I appliquéd all of the small white squares first on the white tone-on-tone fabric, and then cut them to size and assembled each quilt square. The assembly of the quilt was much faster, because I was able to treat each appliquéd square just like a regular piece of the block. I know that I would have had a hard time trying to appliqué all of the squares if the quilt had already been assembled. I know lots of people who can do it that way, but I'm just not that brave! LOL!
 Lots of discussion has centered around the topic of adding embroidery to quilts --- and the main question is always "Do I make the entire quilt first and then add the embroidery, or do I embroider the pieces and then make the entire quilt?"
I prefer to embroider the individual pieces first, and then create the entire quilt. The embroidery process shrinks the pieces by pulling in on them. Your pieces should be embroidered first, and then cut to the proper size to accurately fit your quilt blocks.
In this example, the names of various boats and their owners were embroidered first on the red fabric. After pressing the pieces with a tiny bit of starch, I used them for the paper-piecing process on this quilt. This allowed me to use a tear-away/wash-away stabilizer that will add body to the lettering, but the bulk of the stabilizer (the part that was not under the lettering) will wash out of the quilt over time. Also, there will not be any bobbin thread from the embroidery showing on the back of the quilt.